The 5 Steps of the Improvement Kata
This is an update to a previous article - ‘What is the Improvement Kata?’, written in 2021 - in which I describe the 4-step Improvement Kata model.
Since 2022, in workshops, presentations, and when coaching learners, I have been teaching that there is an ‘unofficial’ 5th step of the IK. An extra reflection step, taken after each Target Condition.
This isn’t something brand-new. I didn’t invent this. In fact it is talked about in the Toyota Kata Practice Guide (page 183-184 if you want to see). It just isn’t called out as an actual step.
And in my experience, many Kata practitioners, even those who have been practising for YEARS, often skip this structured reflection.
Truly, I think this is a huge mistake…so, enough is enough! I am going public and declaring my position. My experience over the past 2 years has shown me that this is a CRITICAL part of the Improvement Kata.
Doing this extra step, and doing it WELL, makes a massive difference to the learners experience, and (perhaps most importantly) their learning.
So, bear with me, I’m going to back up a little and review all 5 steps for context.
The Improvement Kata is a model which helps us to think and behave scientifically.
🪜 It encourages us to take small, intentional steps towards our goal or challenge.
🔎It teaches us to be logical, methodical, and focused on facts and evidence.
💡It helps us develop habits of reflection, analysis, and (ultimately) learning.
My interpretation of the model is shown below.
Step 1: Understand the Direction or Challenge
‘Where do we want to get to?’
I have illustrated this as a flag at the top of a mountain.
The fact it is up a mountain indicates that it is not easy to achieve. This is a stretch, a true challenge. It might seem impossible, a little scary.
The point is the learner does not know how they are going to do it.
I like to make sure that my learner has a clear, concise, memorable challenge statement that they can keep in mind. They can keep referring back to this as their ‘north star’.
Step 2: Grasp the Current Condition
‘Where are we now?’
This step is about clearly understanding where we are in relation to the challenge.
In my picture you can see a path leading up to the mountain. It is not a straight, easy path. It is cluttered with obstacles.
It would be easy at this point for our learner to focus on that flag up at the top of the mountain and start walking in a straight line towards it.
But by focusing so hard on the end goal, they would likely eventually trip over (or fall into) some of the obstacles in their way.
Instead, we want the learner to take a look around where they are.
Look up and down.
Mark the spot.
The critical thing at this stage is to take the time to collect data, and really study and analyse the current situation.
Step 3: Establish the next Target Condition
‘Where do we want to be next?’
A Target Condition is the next place you want to get to on the way to your challenge.
This short-term goal narrows your focus.
Rather than being overwhelmed by the longer-term challenge, our learner can concentrate on where they want to be in the next 1-2 weeks.
They do not need to worry about the whole journey, they just need to focus on the next ‘leg’.
See that next yellow flag – it is in sight, not too far away, but the learner can see it is not easy to get to.
Step 4: Experiment towards the Target Condition
Once the Target Condition is set, then then our learner can start moving forwards and experimenting.
They can start to look for obstacles in their way, and then take steps to understand and overcome them.
I’ve drawn a few different obstacles on the path.
Some might seem difficult from a distance, but when they get up close they realise actually they can just move them aside easily.
See that big clump of trees over the path? The learner will find it is easy to walk through them.
Some might seem easy from a distance, but when they get there they realise actually they are a big problem.
See that crevasse before the first target condition? From the start it seems they can just step over, but once they get closer they will realise it’s a big gap. Maybe they can build a bridge, maybe they walk off the path, maybe they take a running jump (!).
Whatever they try, they will do it in a structured scientific manner of experimenting, supported by their coach.
Ok, maybe a drum-roll for the 5th step? 🥁
Step 5: Pause and Reflect
When the learner reaches their Target Condition (or sometimes just the date for their TC), they take a pause.
They stop, and they reflect.
I’ve illustrated this as a bench next to the flag for the Target Condition, to show this is time to rest.
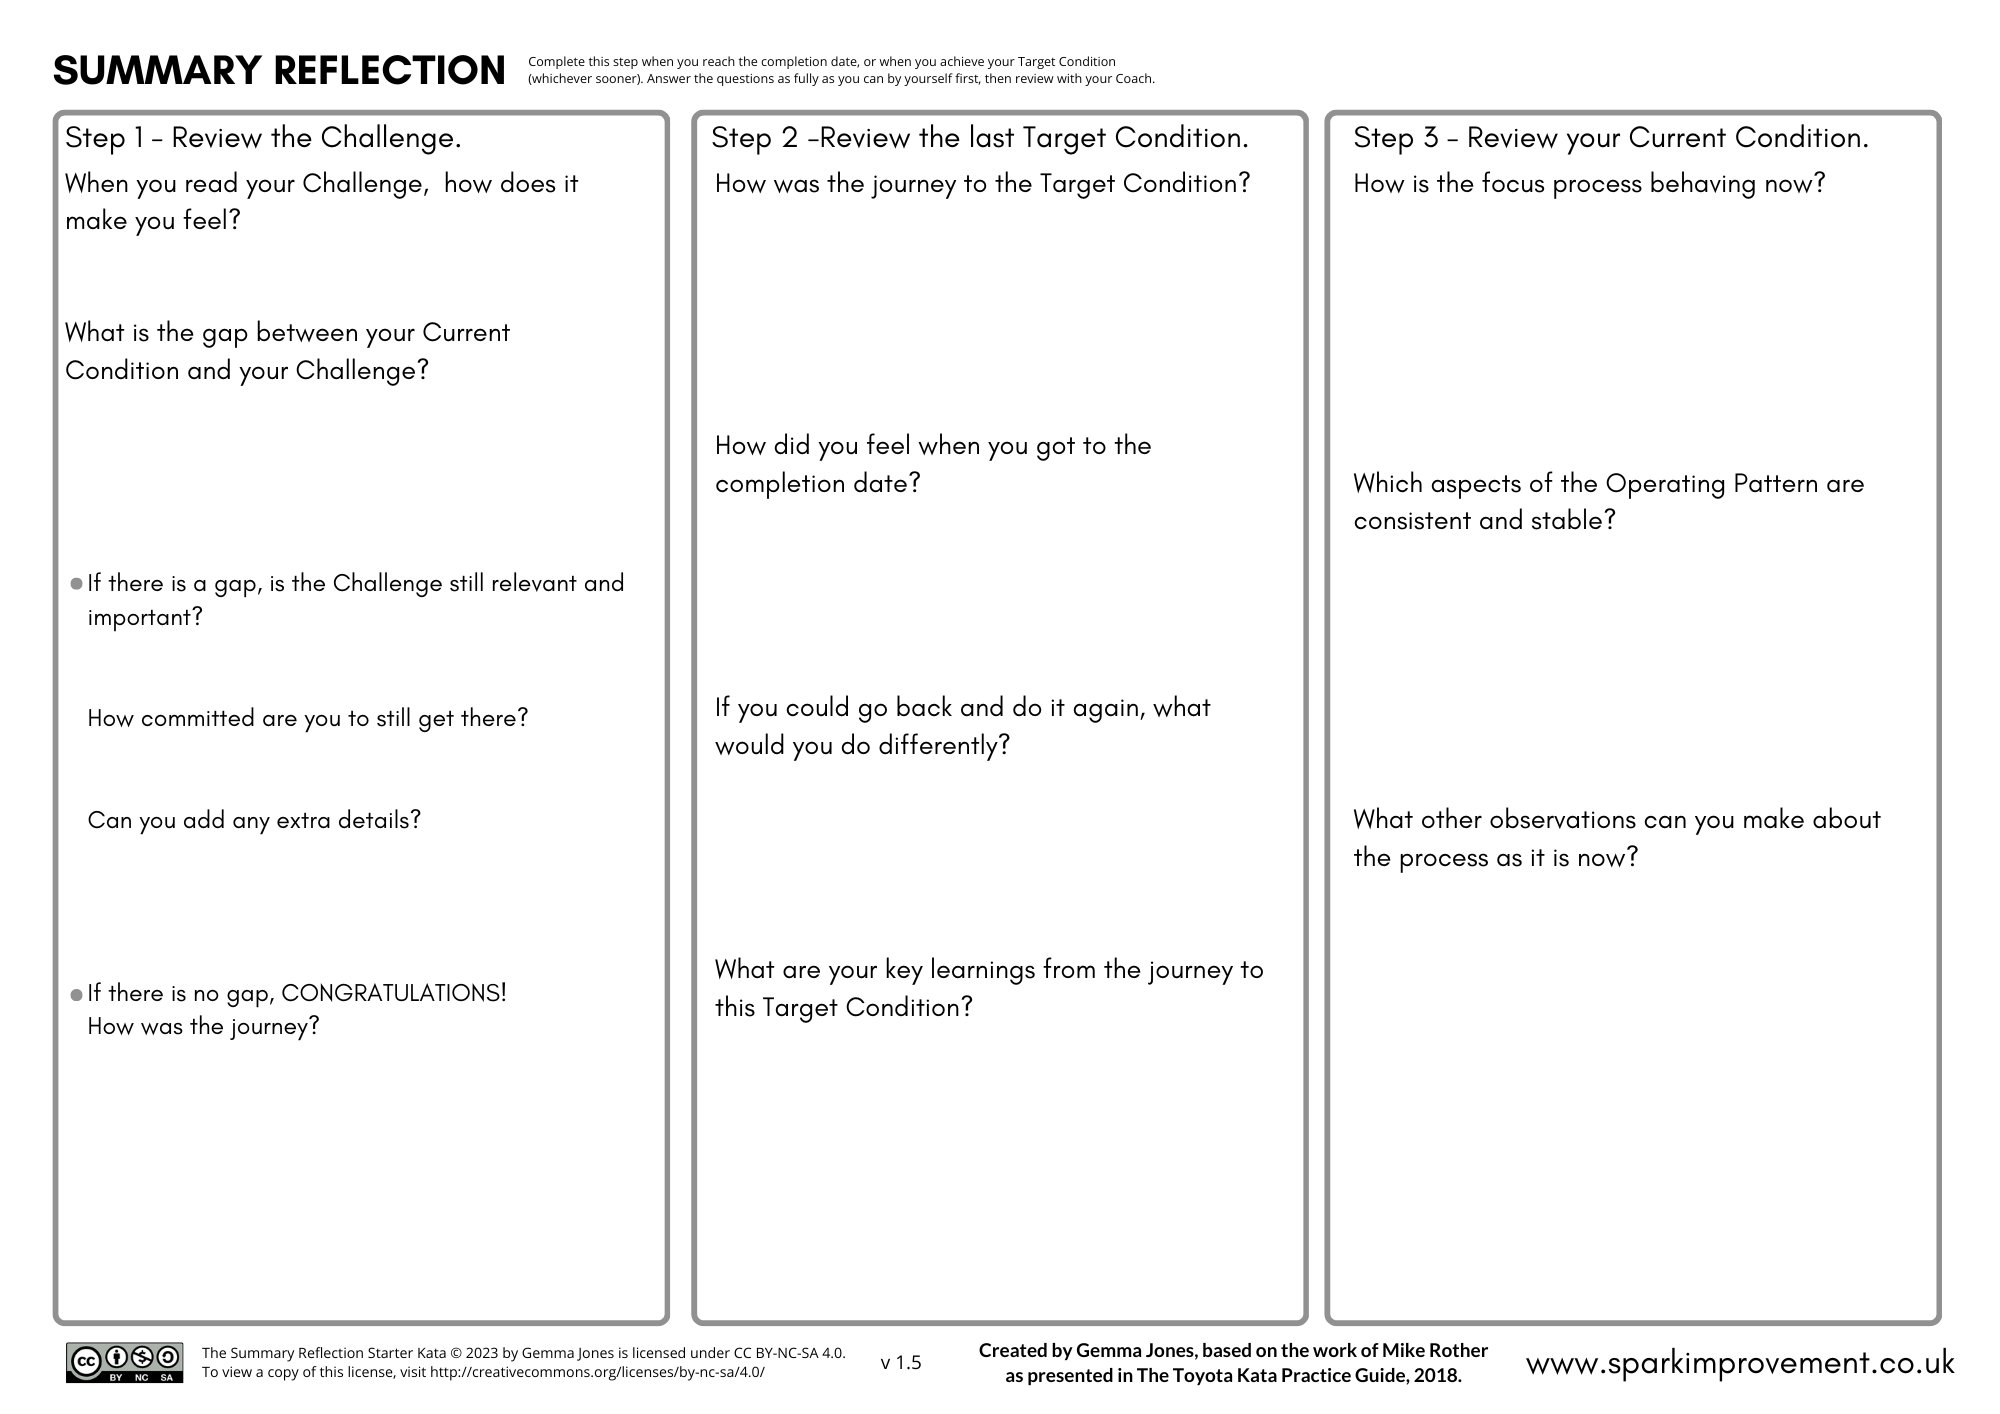
There are three parts to my version of the Summary Reflection:
1️⃣ First think about the challenge. Is that still where I need to get to?
2️⃣ Then consider the journey so far to the Target Condition. Review and consolidate the learnings.
3️⃣ Then consider the Current Condition - how the process is working now.
Once the learner has completed this reflection, then they are in a FAR better position to go ahead and set another Target Condition (or, adjust their challenge, or re-grasp their Current Condition).
Notice there is a bench shown at each of the Target Condition flags. We do this after every TC.
Also, notice that the bench is big enough for the learner and the coach. The coach does their own reflection too - they should pause and reflect on the learners progress, and on their coaching.
So, that is the 5-step version of the Improvement Kata.
I strongly believe the addition of the 5th step SUPERCHARGES the IK pattern.
I have found that learners come to RELISH the opportunity to pause and reflect. That they see the Summary Reflection form as a gold-mine for learning.
Many learners tell me that Summary Reflection is their favourite part of practising Kata. Some even use the form in other areas of their work and life, as a routine to reflect on projects and meetings.
This 5th step brings to mind this amazing quote, from John Dewey (a philosopher and psychologist with expertise in learning) in the early 1900s:
I could not agree more.
One other thing I want to mention. In reality, my illustration (of the mountain, and the path, showing the 5 steps) is actually very misleading.
The full journey, or the path I have drawn would only actually be visible when the learner gets to the flag at the top of the mountain.
There would be multiple paths that the learner could actually have taken.
There would be MANY other obstacles out there in the landscape.
I tried that on the diagram and it was messy and confusing.
So, perhaps this is a better way to show this illustration:
The 5 Steps of the IK
The learner can just see the flag for the challenge up at the top of the mountain.
They can just see the first Target Condition.
They have an idea of some of the initial obstacles.
They can just see the first bench in the distance - where they know they will pause.
It's not quite such a nice, detailed illustration, but perhaps more of an accurate metaphor.
I’d love to know your thoughts on this extra step. Please let me know your comments!


